Tinkerbell Cake
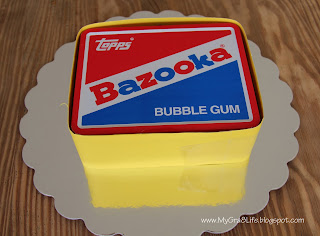
I wanted to make a special cake for my daughter's third birthday. I looked around for ideas and really liked a cake that was similar to the one that I created in the picture above. This cake was actually not hard to make. I had to educate myself about cake making, because I am not much of a baker! So if I can make it, so can you!
Here's how I did it...
Step 1: Get a Wilton Wonder Mold Cake Pan
I purchased the Wilton Wonder Mold Pan Set on Amazon for about $15. You can also purchase it at most craft stores.
Step 2: Prepare Fondant Cake Decorations
About 1-2 weeks before the party, prepare the details that will go on the cake. I purchased a box of Wilton Rolled Fondant at Michael's. I used the rolled fondant to create the flowers, leaves, letters, and rope around the base of the cake. Everything that I read mentioned that fondant is not the best tasting icing to use on a cake. I opted to use a buttercream frosting and fondant only for the decorations, which were easy to remove before eating.
In order to create the fondant decorations you will first need to dye the fondant. I separated the fondant into three sections because I wanted to create three different colors. After the fondant is separated, place a few drops (1 or 2 - a little goes a long way) of gel onto the fondant and knead until the color is evenly distributed. I purchased Buff Color Gels (shown in the picture below) at Michael's.
Next, roll out the fondant. Cut the fondant into desired shapes using cookie cutters. Place the cut-out shapes on a tray and allow to harden in a cool, dry place for 1-2 weeks.
Note 1 - In order to create the leaves, which have a bend to them, you will need to lay the fondant over the edge of the Wilton Wonder Mold Pan. This will ensure that the fondant leaves dry exactly how you want them to look when you place them on the cake.
Note 2 - I placed a tiny edible pearl in the middle of each of the tiny purple flowers.
Note 3 - I created a rope to place around the bottom edge of the cake. I allowed it to dry for about a week, but it cracked when I moved it to place around the cake. I would recommend rolling the rope on the day of the party. It does not matter that the rope has not hardened.
Step 3: Make the Cake
Make your favorite cake mix in the Wilton Wonder Mold Pan. Follow Wilton's directions in order to prepare the cake. I used a box of Betty Crocker's Chocolate Cake mix - nothing special!
Step 4: Prepare the Frosting
I used the recipe for the Classic Vanilla Buttercream Frosting from Savory Sweet Life. This frosting is delicious! The link provided also has a lot of great information about preparing the frosting and other cake decorating techniques.
Classic Vanilla Buttercream Frosting
Author: Savory Sweet Life
Recipe type: Dessert
Prep time:
Cook time:
Total time:
Serves: 2.5 cups
Classic American Buttercream frosting. This recipe uses powdered sugar, butter, vanilla and milk. This is a great recipe for decorating and piping on cupcakes and cake.
Author: Savory Sweet Life
Prep time:
Cook time:
Total time:
Classic American Buttercream frosting. This recipe uses powdered sugar, butter, vanilla and milk. This is a great recipe for decorating and piping on cupcakes and cake.
Ingredients
- 1 cup unsalted butter (2 sticks or ½ pound), softened (but not melted!) Ideal texture should be like ice cream.
- 3-4 cups confectioners (powdered) sugar, SIFTED
- ¼ teaspoon table salt
- 1 tablespoon vanilla extract
- up to 4 tablespoons milk or heavy cream
Ingredients
Instructions
- Beat butter for a few minutes with a mixer with the paddle attachment on medium speed. Add 3 cups of powdered sugar and turn your mixer on the lowest speed (so the sugar doesn’t blow everywhere) until the sugar has been incorporated with the butter. Increase mixer speed to medium and add vanilla extract, salt, and 2 tablespoons of milk/cream and beat for 3 minutes. If your frosting needs a more stiff consistency, add remaining sugar. If your frosting needs to be thinned out, add remaining milk 1 tablespoons at a time.
Note 1 - add a few drops of food dye to make the frosting your desired color.
Note 2 - make 1 extra batch of icing to use on Tinkerbell Cupcakes (described below)
Step 5: Frost the Cake & Smooth
In order to smooth the icing, I followed the directions that I found in an article on eHow - How to Smooth Icing on Wedding Cakes.
1. Cool the cake completely and then use a serrated knife to even out the cake. Cut carefully and with a light touch. Transfer the cake to a rotating lazy susan. You can make the cake stick by spreading some frosting on the surface of the turn table. Brush off any excess crumbs with a basting or pastry brush.
2. Use a frosting spatula or an offset spatula to frost a first layer of icing. Start at the top leaving some icing to overlap to the edges. Now frost the sides of the cake. Refrigerate for 15 minutes.
3. Add a second layer of frosting with a larger spatula. Remove any excess frosting from the top of the cake and scrape on the side of a bowl. Rotate the lazy susan and lightly scrape around the cake while it spins. Refrigerate to set.
4. Use a paper towel after the cake is completely dry. You can test this by touching the cake and if no frosting comes off on your fingers the cake is ready. Place the paper towel on the top of the cake and rub over it with your hand lightly. Move the paper towel to the sides and repeat the rubbing. This technique will work best with royal icing.
This technique works really well! Make sure that you buy VIVA brand paper towels to use for the smoothing process.
Step 6: Apply Decorations
After the frosting on Tinkerbell Cake is smooth, you are ready to apply the decorations. Carefully place the leaves on the top of the cake. Scatter the small purple flowers around the cake. Place the rope around the base of the cake, making sure that the ends are toward the back of the cake. Lay the letters against the rope at the base of the cake.
I purchased a Tinkerbell cake topper at Amazon to place on top of the cake. Place a small amount of frosting under the cake topper and then sit it on top of the leaves. The frosting will act like glue and hold the cake topper in place.
Tinkerbell Cupcakes
- Cupcake liners (purchased on Amazon)
- Tinkerbell Candle (for the birthday girl)
- Classic Vanilla Buttercream Frosting (recipe can be found above)
- Tinkerbell Cupcake Ring Toppers (purchased on Amazon)
- Cake decorating bag and tip
I made a box of Betty Crocker's Yellow Cake mix. I then piped the Classic Vanilla Buttercream Frosting onto the cupcakes using a 1M decorating tip. Click here for directions from Wilton on how to make 1M Swirls.
After decorating the cupcakes, I placed a Tinkerbell candle on the cupcake for the birthday girl. I placed one Tinkerbell Ring Cupcake Topper on each of the other cupcakes. I arranged the cupcakes on a serving tray and set them out at the party.
Star Wand Cookies
In order to make the Star Wand Cookies, you must first make Butter Cookies. In order to make the Butter Cookies, follow the recipe below. This recipe came from my husband's great aunt Kate. The cookies are delicious when covered with icing!
Butter Cookies
1 c butter1 c sugar
2 egg yolks
1 tsp. vanilla
3 c sifted flour
1 tsp. baking powder
1/4 tsp. salt
3 tbsp. milk or cream
paper straws
Cream butter, add sugar, and stir together. Add unbeaten egg yolks and vanilla. Mix well. Sift together flour, baking powder, and salt. Add to creamed mixture alternating with milk. Mix thoroughly. Chill dough. After dough is chilled, roll out and cut-out using a star shaped cookie cutter.
Place a paper straw about half-way up one of the star cookies. Lay a second star cookie on top of the straw. Gently press the two cookies together. Bake at 400 degrees for about 10 minutes or until edges are light brown. All the cookies to cool for 5 minutes then carefully move to a cooling rack.
Colorful Cookie Glaze
After the cookies are cool, apply the Colorful Cookie Glaze in any desired color. The Colorful Cookie Glaze recipe is available from McCormick. It is really easy to make and dries to a hard, glossy finish with beautiful, bright colors!
Click to access the Recipe for the Colorful Cookie Glaze.
For the glaze I used the McCormick Neon Food Color & Egg Dye, shown in the picture below.


