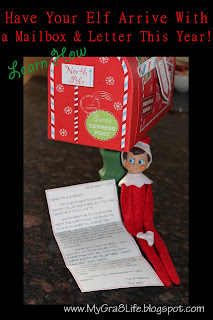
This year when the Elf on the Shelf arrived at our house, he brought with him a mailbox from the North Pole! We didn't have a very good experience with the elf last year, when my daughter was two, so we tried to think of a better way to introduce it this year. Last year, she was a little scared of the idea of an elf sitting around the house watching her all day. This year we thought to get a mailbox to accompany the elf on the trip from the North Pole. Inside of the mailbox was a carefully written letter from our elf, whom my daughter named Timmy. The letter, which can be read below, explained that Timmy was sent by Santa to watch over the children, and he reports back to Santa each night. The letter explained that if my daughter was a good girl, Timmy might bring something small back from the North Pole to put into her Christmas Stocking. It also told my daughter that she could write letters to Timmy or to Santa and put them in the mailbox, and the elf would take the letters back to the North Pole during his nightly return trip.
Follow the steps below to create a mailbox and letter for your Elf on the Shelf.
Steps to Create a Mailbox for Your Elf on the Shelf
Step 1: Get a Mailbox
I found the mailbox pictured below at Dollar General, and it only cost four dollars! It is about 10"L x 6"H x 5"W. The mailbox is made out of a sturdy cardboard and the door opens and the flag moves up and down. It is really cute and perfect for Christmas!
You could use your mailbox as-is or enhance it a little bit like I did. I wanted my mailbox to be up on a pedestal. If you would like to make a stand for your mailbox, keep reading! If not, skip ahead to "Step 6: Write the Letter."
Step 2: Get a Small Spindle
You can find a spindle like the one pictured below for about three dollars at Lowe's. It is approximately 6"H x 2"W.
Step 3: Get a Base
The base pictured below can be purchased at Lowe's for about six dollars. It is approximately 6"L x 4 1/2"W x 3/4"H.
Step 4: Glue, Nail, and Paint the Stand
Using wood glue attach the spindle to the center of the base. My husband has a nail gun, so he put a few nails in the bottom of the base to hold it in place. If you do not have a nail gun, drill a small hole in the bottom of the base then place a screw through the base and the bottom of the spindle to secure it.
Paint the stand a color of your choice.
Step 5: Attach the Mailbox
In order to attach the mailbox to the stand you will need to drill a small hole through the bottom of the mailbox. The spindle that I purchased had a screw attached to one end, so my husband was able to sit the mailbox on top of the screw then fasten it will a wingnut. You might need to purchase a screw/nut to attach it depending on the type of spindle that you use.
The finished product should look similar to the picture below.
Step 6: Write the Letter
Have the "Elf" write a letter to your children explaining why he came to your house and the purpose of the mailbox. Check out the example pictured below...Step 7: Display The Mailbox and Elf
On the first morning, have your elf sitting next to the mailbox. The next night you can then move the mailbox to a permanent location and the elf can start his adventure of finding silly places to sit around the house. This way of introducing the Elf on the Shelf is sure to help your kiddos appreciate and understand the fun behind it!


No comments:
Post a Comment